Managing a business's social media content is a real challenge for most of us. In this article we'll be providing a good content publishing workflow to get you started using social media publishing in Hubspot. We'll look at how to set up an efficient social publishing workflow and execute it in a few easy steps with some inbound pro tips mixed in. This should get you up and running and pumping out decent content using social media publishing in Hubspot.
Get the Hubspot social media publishing tools ready for publishing:
1. Install the Hubspot publishing Chrome extension:

Our first step is to install the browser publishing Chrome extension. At the time of writing this is available under Social -> Settings -> Publishing tab. Look for "Publish quickly and easily from your browser" (at the very bottom of the page). Once added, this will add a Hubspot Icon at the top right of your Chrome browser. You can click this icon to instantly publish the web page in the current tab of chrome. More on this later.
2. Link your social media accounts to Hubspot social accounts:
Under Hubspot marketing -> social -> settings -> Accounts tab. Ensure all your business social accounts are linked here. Click on connect account towards the top right to and follow the prompts to add any missing ones.
Gather good content sources from your industry that your buyer personas are interested in.
You should always look to your personas to ensure you are publishing content that is interesting and valuable for your customers. With inbound marketing everything revolves on connecting with your customer so having well defined buyer personas is key to getting the most out of your content. See Where to start with inbound marketing for more on this. We use a buyer persona checklist to help with aligning our content when we publish social media using Hubspot. Click on the button below to download it:
1. Set up a stream of relevant content for yourself to curate and publish.

Subscribe to blogs, follow influencers and experts, monitor for content with relevant keywords, etc. Make sure you gather all this potentially useful posting material in one place as much as possible to allow you to quickly go through it. Feedly (in the image displayed above) is a good tool to gather relevant content for social posting.
TIP: Taking into account your keyword/Topic cluster strategies when gathering these sources will help you save time when you go through them for publishing later.
2. Use Quuu to curate relevant content straight from Hubspot's social drafts.
To get some easy social posting options for those dark days when your normal content sources fail you, you can integrate a third party content curator directly in to Hubspot. This will create daily drafts in the hubspot social tools. You can create a free account on Quuu and then integrate this by going to your integrations in Hubspot (Click on your profile picture top left in hubspot -> Integrations). We will come back to this later and show you how to use the drafts it generates for social publishing.
Get busy posting to your social networks and build your audience:
You should be ready to do quick and effective social media publishing in Hubspot now. We would recommend We recommend publishing several pieces of content throughout the day. Don't worry, once you practice this a few times, each run can take just 1 minute to complete!
1. Open a piece of social content you would like to post in your browser:
Look through the content sources that you have tapped above and find a good article, video, post. Any piece of relevant content that connects with your buyer personas will do. Once you identify a good piece of content, open the page in Chrome and click on the Hubspot icon ![]() in the top right of your screen. Select the social networks you would like to publish to.
in the top right of your screen. Select the social networks you would like to publish to.
TIP: If you integrated Quuu . Have a look in hubspot Marketing -> Social -> Publising -> Drafts. You should see a list of relevant curated content ready for posting that could be very useful as an addition to your other sources. See below: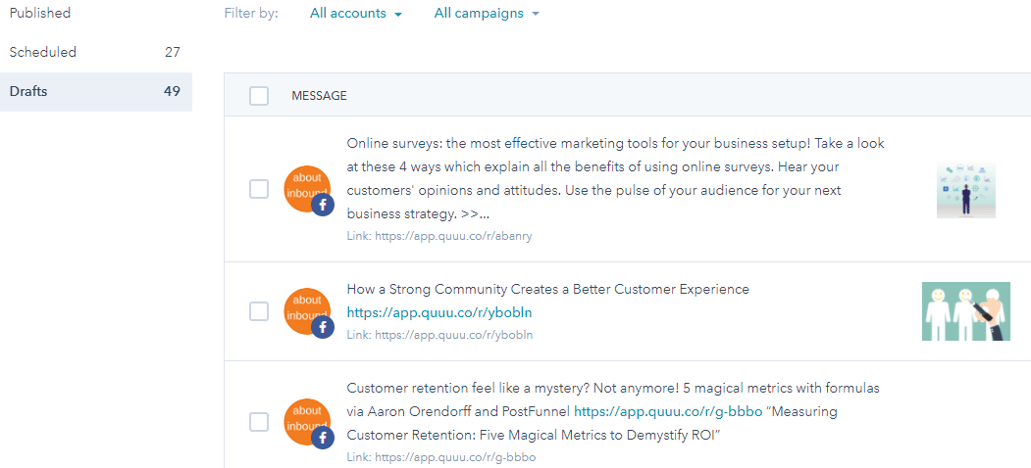
2. Edit your posts and schedule a time for each Social channel:
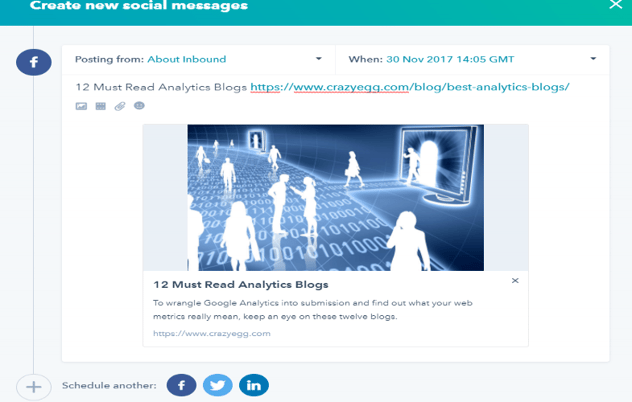
When you click on the Chrome extension, a post pops up with a handy excerpt for each network you post to. The first available recommended time will automatically be selected next to When (see picture above). You can select another time and date based on your preferences. You can edit the post to ensure the formatting is correct for each social network (e.g. adding hashtags for your keywords in the twitter posts might be a good idea; Keep an eye on your character limits).
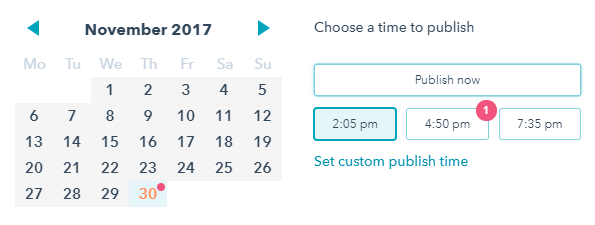
TIP: You might want to send the same post out multiple times on platforms like twitter to ensure you reach more of your audience at different times. You can do so easily by just clicking the twitter icon below your post again. This will clone the post as many times as you like.
3. Review and tag a campaign as applicable:
Once you have cloned the post for all you social networks and are happy with the content and scheduled times you can tag the posts to a campaign at the bottom right of your screen. Now go ahead and press schedule.
Well done! You have now curated a piece of content and scheduled it out across your social networks.
4. Set aside time to publish content in bulk.
This will allow you to get efficient quickly and will make sure to build engagement.
TIP: for scheduling content out using the Hubspot social plug in:
Remember to schedule at times that might be relevant for your audience and to space out your posts.
If a post was already scheduled on a network you will see a red dot when clicking on the time and date in your post so you can select a different time/date if you come across this.
PRO TIP: for monitoring and augmenting your scheduled social content: Once you have scheduled out a number of posts, open Hubspot Marketing -> Productivity -> Calendar. You will see all your posts scheduled over a month or week. Very useful for identifying content gaps. You can also click on a post to clone it from here to quickly fill a gap or amplify a message.
Do you have other tips on how to make social publishing in hubspot more efficient?
We'd love to read your favourites hubspot tricks!
